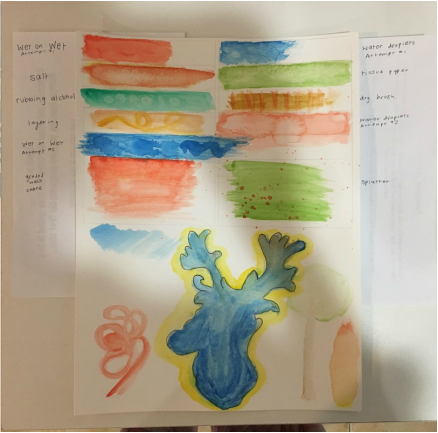
 For my first watercoloring experience, I followed a Youtube tutorial on basic watercoloring techniques. Progress
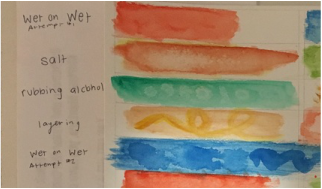
One of the techniques I did, wet-on-wet, required applying two diluted layers of watercolor on each other. I did this technique twice because my first attempt looks more like a bland solid strip of watercolor rather than a mix of hues like it does in the example. Fortunately, by the second time, I was able to produce much more vibrant shades. I guess you can call that my first success. For the other samples, I did what was asked of me. I used salt, rubbing alcohol, water droplets, dry watercolor paint, layers, and tissue paper.
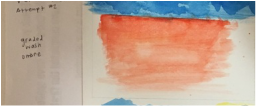
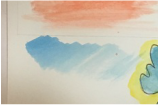
Another difficulty I had was with my ombre grade wash. Instead of being a continuous gradient, it was a collection of harsh horizontal lines. Like with my second wet-on-wet attempt, adding more water to the paint helped with the fluidity of my second ombre grade wash. Underneath my experimentation is my first “art piece.” The deer head, which I strangely spent more time drawing than watercoloring, was meant to be an application of the ombre grade wash I was experimenting with. Sadly, it did not work out because I used too much water in some parts and too little in others. It was initially just the deer head I planned to paint, however I became amused with the colors and was determined to do something right. I painted the tree and fire using quite a bit more water than last time and surprisingly, they became the best pieces of my watercoloring attempts so far.
A week later, I continued my journey. This time, I painted simple flowers. Again, I relied on a Youtube tutorial for inspiration. The orange flower in the top left was the first flower I painted. Aside from the color difference, it did not look like the tutorial because I concentrated my watercolor in a tiny area and couldn’t use water to spread it out more. Sigh, looks like more water can’t solve everything. After I finished the tutorial, I proceeded to add stems and a vase to make the painting my own. I attempted to create an ombre effect for the vase to make it look shaded. It failed miserably because too much water was used and it dispersed, producing white spots in the center where I diluted the paint the most and dark hues near the edges. ReflectionBefore this experimentation, I did not realize that outside materials, such as rubbing alcohol and salt, would be something to enhance my artwork. This realization showed me that watercoloring is more complex than brushing paint onto paper and having the watercolor take its course. Although I did not get all of the techniques down, I did finish my first piece with a better understanding of watercolor in general like I wanted. As for my second piece, I learned that getting that right combination of water and watercolor to produce smooth lines is not easy. After my first “artwork,” I was convinced that more water would make improve the flow and consistency of my work, but by the end of my second piece, I found out that isn’t the case. Like people say, too much of something is not always a good thing. I’m mildly happy with my flowers. Sure, they look more like roses than the flowers in the tutorial but the texture and flow some of them have really embody my interpretation of what watercolor looks like and makes me feel like I’m getting somewhere with this project. Overall, I learned that patience is not the only aspect difficult about watercoloring; technique and watercolor to water ratios come into play as well. For more artworks to come, let the journey begin.
0 Comments
Leave a Reply. |
AuthorHigh school junior with very limited knowledge on watercolor Archives
May 2017
Categories |


 RSS Feed
